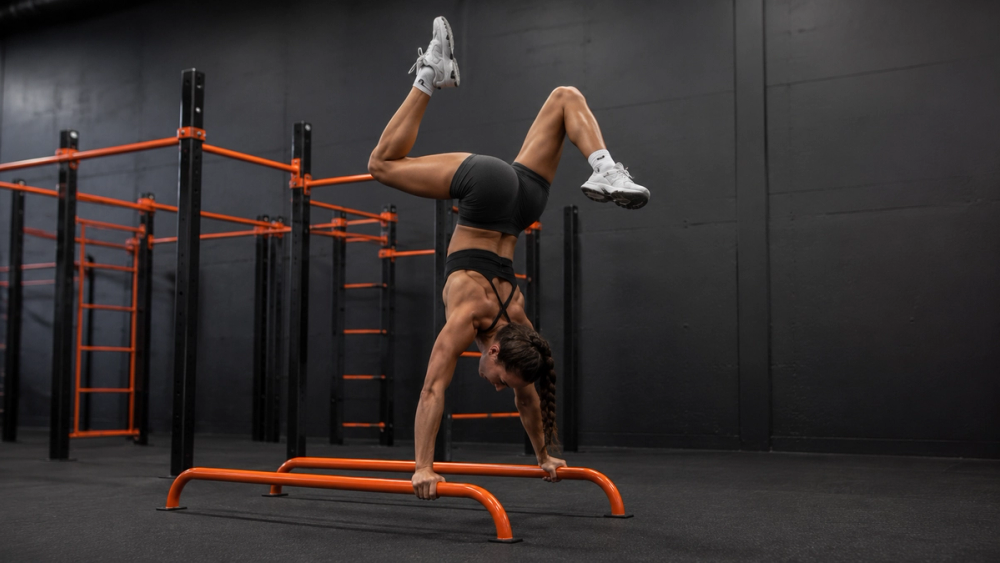
One of the basic hallmark exercises of calisthenics is the parallel bar dip.
For beginners who have never trained before, it can be a difficult exercise, and they may not even be able to do a single strict rep.
In this article, we’ll look at the correct dip technique, how to get your first dip with clear progressions, key exercises, an example routine, frequently asked questions, and much more.
What Is a Parallel Bar Dip and What Is the Correct Technique?
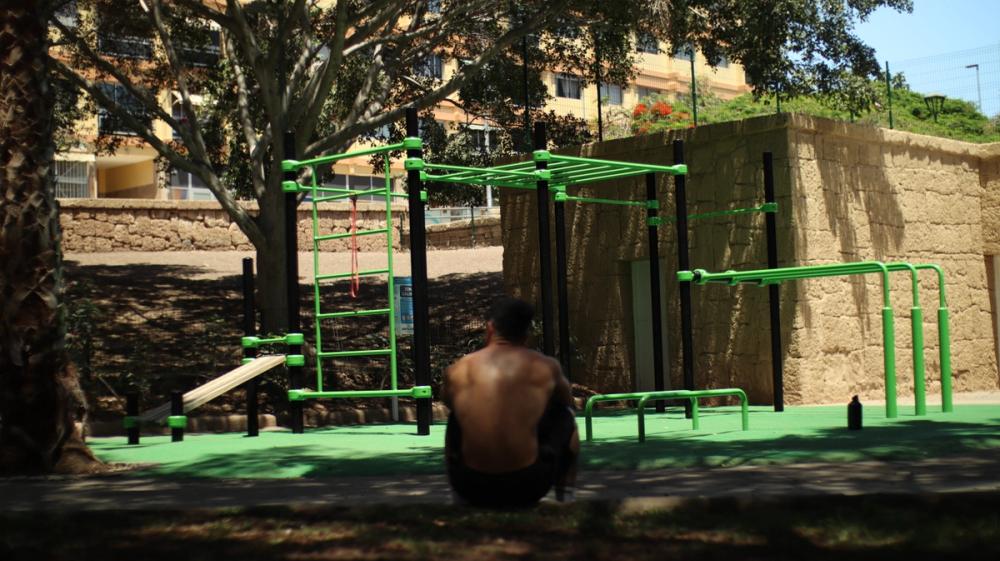
A parallel bar dip consists of supporting yourself with your hands on a set of parallel bars, with your body vertical and perpendicular to the floor, your elbows extended, and fully locked out. These parallel bars are usually rigid, between 35 and 50 mm thick, and set about 55 cm apart.
From this starting position, you descend by leaning your torso and head slightly forward, bending at the hips slightly, and lowering until your elbow bend goes slightly past 90°, so it’s clearly visible that you are using a full range of motion.
From that point, you use the strength of your chest, triceps, and front delts to extend your elbows again and return to the starting position, locking them out completely.
Other Technical Options
In calisthenics, there have been different strict variations and ways of doing parallel bar dips over the years as the sport has evolved.
Some people believe it is stricter to stay completely upright, without bending at the hips or leaning the torso. Visually, this position looks quite clean and strict, since the body stays very straight and there is no torso movement. But it can place a lot of strain on the shoulder joint and is not very efficient when it comes to producing maximum force from the chest and delts. Therefore, it is not an optimal technique.
On the other hand, people who use a lot of added weight and want to maximize how much they can lift in this exercise bend at the hips much more and lean their torso a lot. This allows them to produce much more force and lift more weight, but the movement looks much worse, since it starts to resemble a hip bend where the legs stay level rather than an actual dip. On top of that, one of the basic principles of the exercise is lost: the body should lower and rise again together with the arm bend.

This has created some controversy, because in Streetlifting competitions (weighted calisthenics), there are athletes lifting a huge amount of weight on dips while using this exaggerated hip bend, where you can see that the weight and their hips barely lower and rise with the dip itself. This has sparked debate, and some measures have even been added to competition rulebooks to prevent it. So this technique is not optimal either, neither aesthetically nor in terms of the actual definition of the exercise.
Why Can’t You Do Your First Parallel Bar Dip?
Even though it may look like a simple exercise from the outside, parallel bar dips require a level of chest, triceps, and shoulder strength that many untrained people simply do not have.
It’s common for a beginner with no previous strength training background to be unable to do even one dip.
On top of that, it’s not a movement that shows up often in daily life, or even in many other sports or workouts, so a lot of people do not have the proprioception to perform it at first.
The good news is that with a short period of training and adaptation, you’ll be able to achieve it without too many problems by using the progressions we’re going to show you below.
Which Muscles Do You Need to Strengthen to Do Dips?
Parallel bar dips mainly involve shoulder flexion and elbow extension. That means the most important muscles are the chest, triceps, and front delts.
Depending on the type of dip we do and our body position, torso lean, and whether or not we bend at the hips, one muscle group will take on more of the work than another.
For example, if we stay completely upright, the triceps will take on a bigger role, since the chest and shoulders will not be in such an efficient position to apply force.
However, if we lean slightly and bend at the hips a bit, the chest and front delts will take on more of the work, since they’ll be in a more efficient position to produce force.
Progressions to Get Your First Parallel Bar Dip
Below are the progressions we recommend for achieving your first parallel bar dip, ordered by difficulty in the same sequence we recommend learning them.
Push-Ups
First of all, it’s worth mentioning that beginners in calisthenics usually learn floor push-ups before parallel bar dips.
For that, you also have a list of progressions you can follow step by step, which you can find in this article.
Being able to do push-ups will give you a basic level of chest, shoulder, and triceps strength, which are exactly the same muscles you’ll use in dips. So it will help a lot.
That said, being able to do push-ups is not mandatory before learning dips. We leave that up to you, but you should know that push-ups are usually learned first.
Bench Dips
This is a very practical and simple variation because it allows you to keep some of your weight supported on the floor and perform dips with only part of your total body weight. It also doesn’t require parallel bars, since you can do them on any chair, bench, couch, low table, or anything at a similar height, which also makes them a very good option for training at home without equipment.
Place your hands on the edge of the bench, shoulder-width apart, with your fingers pointing forward. Move your hips in front of the support. You can keep your legs slightly bent to make it easier or straight to make it slightly harder. Lower yourself under control by bending your elbows until you reach a comfortable range, keeping your chest open and your shoulders stable. From there, push until your elbows are extended and return to the starting position.
Isometric Hold on Parallel Bars
This is a very simple but necessary progression for people who have never done exercises on parallel bars before, because it helps your muscles adapt so you can stabilize in that position, stay in control, and avoid swinging. You’ll also start building chest and triceps strength.
Simply use a step or a small jump to get yourself onto the bars and hold the isometric position with your body completely straight and your gaze forward. If you notice that you start swinging or shaking excessively, come down safely.
Partial Range Dips
Once you can stay stable in the isometric support position on the bars, you can start trying small partial reps. Don’t worry if, at first, these reps are very short, even ridiculously short in some cases. That’s normal, and they will help you build strength so that little by little you can increase the range until you gradually reach the goal: 90 degrees of elbow flexion.
From the isometric support position on the bars, bend your elbows slightly until you reach a point where you feel you can still press back up and extend them without failing. As we mentioned, even if they are very short at first, your goal over time is to gradually increase the range until you reach 90 degrees. You’ll notice that with each training session you can go a little deeper, and they will look more and more like full dips.
Negative Parallel Bar Dips
The negative, or eccentric, consists of getting into the starting isometric support position on the bars and lowering yourself under control, gradually bending your elbows until you reach the 90-degree point or go slightly past it. Once you get there, don’t try to press back up. Just place your feet on the floor and let go of the bars.
This will help you build strength through every part of the range of motion and improve your partial-range dips until you can perform them through a full range.
Assisted Dips with a Resistance Band or a Gym Machine
Another tool that can help you achieve dips is using a resistance band or an assisted dip machine at the gym. But we recommend using these strategies as a complement to your main training with the progressions we mentioned above. Do not use these methods as your main training. They are a good addition, but not the best strategy for achieving dips.
Full Dip Attempts
Once you’ve worked on all these progressions for at least a few weeks and improved your strength and stability, you can start attempting full dips.
We recommend doing them at the beginning of your workout, after a good warm-up, so you can assess your progress in this movement. Don’t get frustrated if you don’t get them right away. It’s normal for it to feel like you’re still far from a full rep, but over time you’ll reach a point where it no longer feels so far away, and eventually you’ll get it without much trouble.
With partial-range dips, you can also see how far you’re getting as you progress and the weeks go by.
Once you achieve your first full dip, keep doing it at the beginning of your workouts so you can work toward more reps and fully internalize the exercise.
Technique in the Progressions
Always pay attention to your technique in every exercise, both in your full dip attempts and in the different progressions, always using the technique we described at the beginning of the article as your reference.
We recommend filming yourself so you can check whether your technique is correct and make the necessary adjustments.
A Simple 4-Week Plan to Get Your First Dip
If you still can’t do a full dip, you don’t need a complicated routine. You need a simple progression, to repeat what matters, and to give your body time to adapt.
A reasonable frequency for beginners is 2 or 3 sessions per week, leaving at least 48 hours of rest between them. If you train more, you won’t always progress faster. Many times, you just accumulate fatigue and your technique gets worse.
You can organize these 4 weeks like this:
Weeks 1–2: Build Control and Base Strength
- Bench dips: 3–4 sets of 8–12 reps
- Isometric holds on parallel bars: 3–5 sets of 15–20 seconds
- Push-up work if you can do full floor push-ups; if not, one of the progressions such as incline push-ups or knee push-ups: 3 sets of 6–10 reps
Here, the goal is to keep the body stable and strengthen the pressing portion that usually limits beginners the most.
Weeks 3–4: Move from Assistance to the Real Attempt
- Partial dips, very short at first, and then increasing the range as the sessions go by: 4 sets of 6–8 reps
- Negative dips: 3–5 sets of 3–5 reps with 3 to 5 seconds of controlled lowering
- Bench dips: 3 sets of 12–15 reps
- Push-ups (full or a progression): 3 sets of 8–12 reps
From week 4 onward, you can repeat this routine but start each session with full dip attempts, when you’re still fresh. Also try to gradually increase both the number of reps and their quality until you achieve your first dips.
As for rest, use this simple reference:
- 60–90 seconds for accessory exercises
- 90–120 seconds for difficult exercises and negatives
- 2–3 minutes for full attempts, if you need it
There’s no need to overcomplicate it at the beginning. If over these 4 weeks you train consistently, take care of your technique, and follow the progression properly, you’ll already have a solid base to get your first dip.
Mistakes That Stop You from Getting Your First Dip
Sometimes the problem isn’t a lack of motivation, but repeating mistakes that make you lose strength or control in the movement.
1. Letting Your Shoulders Collapse
One of the most common mistakes is letting your shoulders drift forward and downward at the bottom of the rep, as if you were collapsing into the position. That usually makes you lose stability and makes the press back up much harder. The idea is to lower with control, keep the chest active, and not give away the position.
2. Flaring the Elbows Too Much
When the elbows flare out too much, the dip usually becomes less efficient and more chaotic. You don’t need to keep them glued to your body, but you should avoid letting them drift too far outward. A cleaner movement usually comes from elbows staying relatively close to the torso and a controlled descent.
3. Going Too Deep Without the Strength to Come Back Up
Going deeper is not always better. If you still don’t have enough strength, forcing excessive depth will only leave you stuck at the bottom or make you lose your posture. First, gain control in a range you can handle. You can go deeper later, once you have the real strength to do it properly.
4. Focusing Only on Bands or the Machine
Assistance can help, but it shouldn’t be your only tool. If you only do band-assisted or machine-assisted dips and never work negatives, simpler variations, or extra triceps and pressing strength, your progression will be incomplete. To get your first real dip, you need to combine tools, not depend on just one.
In short: if you want to progress, don’t just look for “something similar” to a dip. Focus on improving the parts that actually build it: control, strength, technique, and specific practice.
How Long Does It Take to Get Your First Dip?
In most cases, a realistic range for getting your first dip is between 4 and 10 weeks. Sometimes it will be sooner. Sometimes it will take longer. The important thing is understanding what it depends on.
You’ll usually progress faster if:
- you can already do push-ups with good technique
- you have some experience with pressing exercises
- you train 2 or 3 times per week
- you have good control of negatives
- your body weight is not too limiting relative to your current strength
On the other hand, it usually takes longer if:
- you’re starting from zero in pressing strength
- you struggle to support your own body weight
- you train infrequently or without structure
- you only do occasional attempts without a clear progression
As a general reference:
- 4–6 weeks: if you already have a decent base and only need to adapt to the movement
- 6–8 weeks: if you have some strength, but still little specific control
- 8–10 weeks: if you’re starting with less strength, technique, or training frequency
Don’t obsess over an exact date. Before your first full dip, clear signs of progress usually appear: you lower more slowly on negatives, you need less help on assisted reps, and you look more stable at the top. If those things are improving, you’re moving in the right direction.
After Your First Dip: How to Keep Progressing
Getting your first rep is great, but the next step is not to start doing random dips. The smart move is to consolidate that first dip so it stops being an isolated rep and becomes an exercise you can actually use in your training.
The first step is simple: turn that first rep into a basic and stable amount of volume. A good initial goal can be to reach 3 sets of 3–5 clean reps. Once that no longer disrupts your technique, you can start working in slightly higher rep ranges, such as 6–8 reps.
You can also progress in several ways without overcomplicating things:
- improve the range with control
- make the lowering phase slower
- add a brief pause at the bottom or top
- accumulate more total reps without losing technique
What you shouldn’t do is rush too much. If your first dip is still barely there, it makes no sense to think about adding weight or moving on to harder variations. First, turn that dip into a solid foundation.
From there, the movement naturally fits into broader goals. For example, it can become part of a well-structured push routine, or play a clear role if later on you want to focus more on upper-body hypertrophy. But that comes later. First, master the basics.
Train with Calisteniapp
If you want to approach parallel bar dips with more structure and consistency, Calisteniapp gives you access to beginner progressions, programs that include them in different ways depending on your level and goal, intelligent Evo routines so you don’t have to improvise each session, and 21-day challenges that help you stay on track when training gets hardest; if training with a clear structure that is genuinely useful sounds like a fit for you, you can download it on Google Play or the Apple App Store.
By Yerai Alonso