What Equipment Should a Calisthenics Park Have
Discover what equipment a calisthenics park should have: bars, structures, stations, and key elements to train correctly.

The human flag is one of the most spectacular and iconic movements in calisthenics. Seeing someone hold their entire body in the air, completely horizontal and seemingly defying gravity, makes this exercise look impossible for most people. However, although it is a demanding skill, it is much more achievable than many people think when trained properly.
In fact, the human flag is one of those static holds that many people can achieve without having to go through dozens of complex progressions. With a good strength base, correct technique, and a well-structured training plan, it is possible to progress much faster than most people tend to think.
In this article, I’m going to explain exactly what the human flag is, what the correct technique is, which muscles are involved, what the most common mistakes are, and which progressions you can use to achieve it step by step.
We’ll also look at some prerequisites and complementary exercises that can help you master this skill faster and more efficiently.
The human flag is a calisthenics exercise, or static skill. It consists of keeping the body suspended in the air, in a completely straight and horizontal line, using the arms as a lever, just like a flag on a pole.

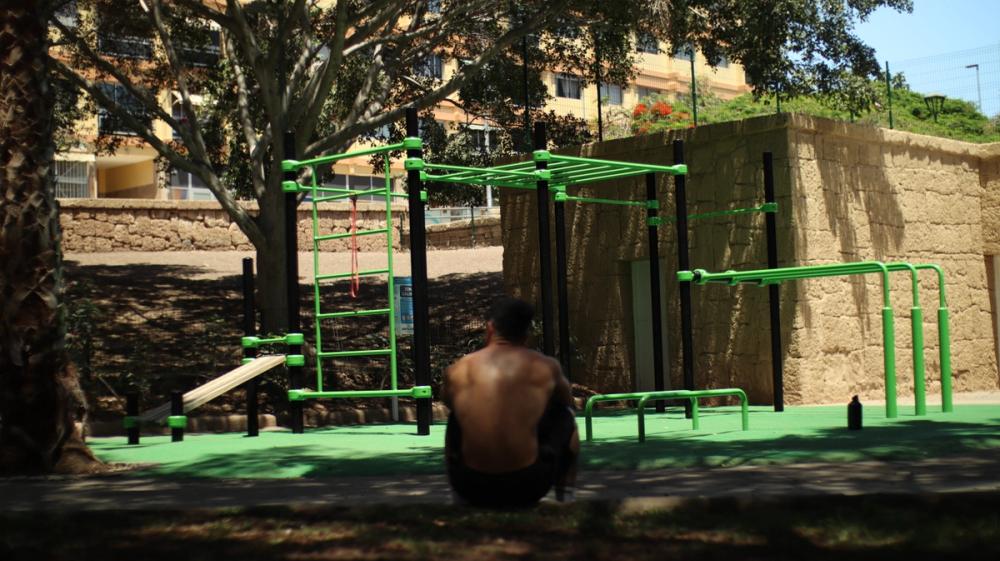
The human flag can be performed on two horizontal bars at different heights, such as a vertical ladder or Swedish bars, or on a vertical bar or pole.
To start, I recommend doing it on horizontal bars. This will make the exercise much easier, since the grip is more comfortable and the body will not rotate as much as it does on a vertical bar.
I also recommend starting on the lowest bars you have available. This way, you only have to lift your feet and apply the force needed to hold yourself in the air.
If you do it on very high bars, you will have to lift your body from below, start from the top and lower into position, or jump into it. In any case, you will have to apply much more force, both to get into the position and to prevent your body from rotating.
How wide should your grip be, or how far apart should your arms be? Obviously, your arms should not be too wide or too close together, since at these extremes it is almost impossible to perform the flag.
Generally, the ideal width is when the arms form an angle of approximately 45°. Keep in mind that this is only an approximation; you can bring your arms slightly closer together or slightly farther apart. This will depend on each person’s anatomy and on the bars they have available.
In fact, sometimes horizontal bars are too far apart, meaning you may not be able to find the ideal width for you. In those cases, it is almost impossible to perform the exercise.
When gripping the bars, try to keep your hands as aligned as possible. If one hand is farther forward or farther back than the other, when you try the flag, your body will rotate and you will fall.
In fact, if you can, grab the bar right at the edge, so that your hands touch the bar supports. This way, you will make sure you are perfectly aligned.
The next step is to position your body as if you were doing a side plank. This means your entire body should be facing one of the two sides. Neither your feet, nor your chest, nor your head, nor any other part of your body should be facing up or down.
Once you are in position, the lower arm should push hard against the bar, while the upper arm should pull hard on it. These are two opposing movements.
Finally, you need to lift both feet and contract almost your entire body to hold the position, preventing your body from arching or your hips from dropping.

Now let’s go over all the muscles involved in this exercise.
As I just explained in the previous section, at shoulder level, each arm performs an opposite movement.
The lower arm performs a push, scapular elevation, and shoulder abduction. The muscles involved in these movements are the deltoid and the upper trapezius.
On the other hand, the upper arm performs a pull, scapular depression, and shoulder adduction. The muscles involved in these movements are the latissimus dorsi, teres major, and lower trapezius.
Then we have the muscles that perform an isometric lateral flexion of the spine or, in other words, an anti-lateral flexion of the spine. Therefore, the obliques on the upper side will mainly contract.
Finally, there are the muscles responsible for keeping the legs elevated. In this case, something similar happens, because to keep the upper leg elevated, hip abduction is performed. The muscles that perform this function are the glutes, mainly the gluteus medius and minimus. However, to keep the lower leg elevated, the opposite movement is performed: hip adduction, which is carried out by the adductor muscles.

Just as with the front lever and the full planche, many people think the flag is an ab exercise, but in reality, the main muscles involved in this skill are those of the shoulder and scapula.
In second place, we do have the lateral flexors of the spine, and in third place, the hip abductors and adductors.

From this point on, I’m going to speak mainly from my own experience and anecdotal evidence.
The human flag is one of those few skills that can be achieved relatively easily if you have a very good level in the basics, unlike exercises such as the front lever or the full planche, which require much more specific training.
Therefore, I’m going to try to establish some minimum requirements, but I want you to keep in mind that these are only approximate numbers and that the stronger you are in the following exercises, the easier it will be to achieve the human flag.

Wide-grip pull-ups work shoulder adduction and scapular depression.
The more reps you can do, and especially if you can do weighted pull-ups, the better it will be when you start training the human flag.
If you want to learn more about this exercise, I recommend the following article: Pull-ups: exercises, benefits, and how to progress

In this case, pike push-ups, also with a wide grip, work shoulder abduction and scapular elevation.
Again, the more reps you can do, the better. In fact, if you can do wall-assisted handstand push-ups, even better.
If you want to learn more about this type of push-up, I recommend the following article: Shoulder push-ups: variations, technique, mistakes, and progressions.

The side plank works lateral flexion of the spine and isometric hip abduction.
Likewise, the longer you can hold it, the better. In fact, if you can do the plank with your feet elevated, so that your body forms a horizontal line, even better.
These two exercises are not mandatory, but being able to perform them will give you a huge advantage when training for and achieving the human flag. This is because each one works scapular depression or elevation with one arm.
There are several progressions for the human flag. However, as I mentioned, if you have a very good level in the basics, you will not need that many progressions. Personally, I only needed the following progression to achieve this skill:

Just as you use a band to train the front lever and full planche, you can also use one for this exercise.
To do this, it is best to perform the exercise under monkey bars. This way, you can place the band so that it applies tension as vertically as possible.
The best thing about this progression is that, if you find it very difficult, you can place the band on a bar farther away or place it on your feet, which will give you more assistance. As you progress, you only need to place the band closer and closer: first at the knees and, finally, at hip level.
As I mentioned, this was the only progression I used to achieve the isometric human flag, and I think that, in most cases, you will not need any more exercises.
However, you may not have a resistance band, you may not have monkey bars to place the band as I explained, or you may simply want to perform this exercise dynamically, for example, moving from top to bottom. So I’m going to explain other progressions that may be better suited to your specific context.

The flag plank is a flag with one foot supported or, seen another way, a side plank with the arms in a flag position. You could say this is the first progression you should do to understand how to apply force with each arm.
For this exercise, I recommend trying to lift the upper leg and push with the lower leg, so that you become as horizontal as possible. At the same time, you train the hip abductors. You could also place a box or chair to keep your feet together.

In the previous progressions, you use assistance, either by supporting your foot or using a resistance band. In this case, you do not use any assistance; you simply reduce the difficulty of the exercise by modifying your body position. Here we find progressions such as the tucked flag or the one-leg flag.
These types of progressions applied to the flag can be somewhat confusing or even uncomfortable, since it is normal to struggle to find the correct position and, as a result, end up rotating or falling off the bar. That is why I recommend doing them only if you really cannot perform the band-assisted flag.
Although I never did this progression, I think it is an excellent option because it does not change the body position too much, unlike the previous case, since you only have to open your legs while keeping your body in the same plane.

Image taken from: Simonster Strength on YouTube
Another interesting progression is performing the inclined flag, with the body at around 45°. To progress, you only have to gradually increase the inclination of the body until you can perform it with your body completely horizontal.
All the previous progressions are isometric or holds, meaning they consist of maintaining the position for a short period of time. However, you can also perform dynamic variations, moving the body from one position to another.

This progression is performed on higher bars and consists of kicking the body into the flag position, holding it for a few milliseconds, although if you can hold it longer, even better.

This exercise is the opposite of the previous one, since you start from the top and slowly lower into the flag position.
It is preferable to do it on vertical ladder-style bars so that you can climb to the upper position and, from there, lower in a controlled way. If you try to jump from below, it will be almost impossible to get it on the first attempt.
Both this exercise and the previous one can be quite complicated, so you can perform them by applying the previous progressions: with a resistance band, in tucked, or in straddle.
Again, if you improve your strength in the basics and perform one or two flag progressions, in most cases it is almost unnecessary to do more exercises.
However, there are some interesting exercises you could do to complement your training and achieve this skill faster.

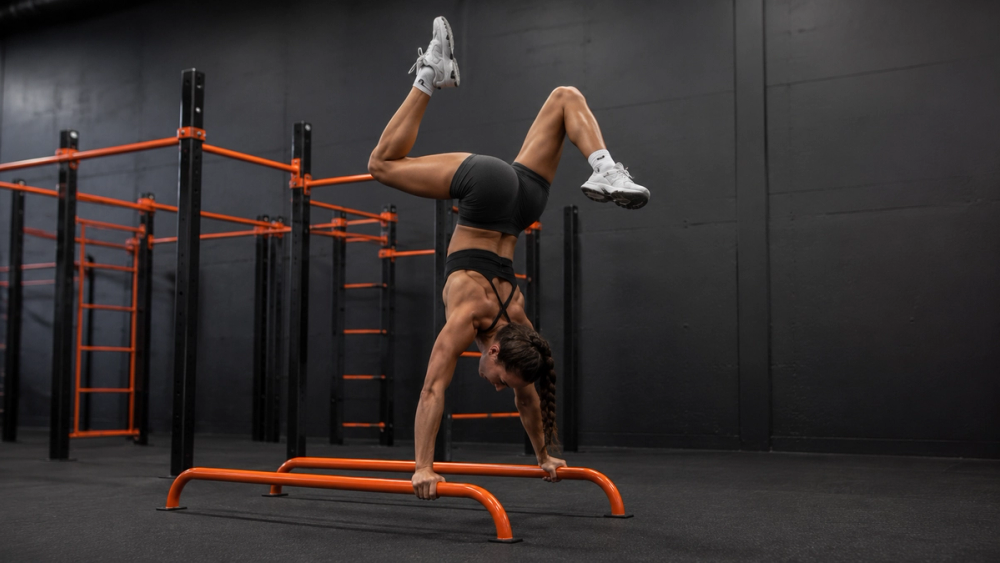
This exercise is basically a handstand with the arms wider apart. With this handstand variation, you are working shoulder abduction and scapular elevation at the same time, which are exactly the same muscle actions involved in the flag.
You do not need to do the exercise exactly as shown in the reference image. You can perform it with a smaller arm width, on parallettes, and assisted against a wall, since the important thing is not balance, but how you apply force.
If you want to learn about all the static skills that exist in calisthenics, I recommend the following article: All CALISTHENICS STATIC SKILLS Explained + COMPLETE DIAGRAM

This exercise is something like the opposite of the previous one, since you have to hang and move your body toward one of the two sides, pulling with one of your arms.
Therefore, you are performing shoulder adduction and scapular depression. In addition, you will also be working the obliques.
A very common mistake when practicing this skill is bending or flexing the elbow of the upper arm too much.
Although it is normal for the arms not to be completely straight, you should still make sure the arm is not too bent or flexed.
Another very common mistake is letting the hips drop slightly while the feet remain up.
In the flag, the entire body must form a completely straight line. If this happens to you, it is because you still do not have the strength needed to maintain a correct position.
In that case, it is best to take a step back and master the progression with which you can keep your entire body straight.
In the human flag, the entire body must be completely sideways, facing forward.
If you try to perform it while looking down or up, you will be in a somewhat uncomfortable position and, in fact, your body will probably rotate and you will fall.
Therefore, once you have placed your hands in a good position, simply look forward before lifting your feet.
As always, this will depend on each person.
However, if you have been practicing calisthenics for a while and already have a good level in the basics, the human flag is a relatively easy and quick skill to achieve.
In my personal case, it took me between 2 and 3 weeks to achieve it, training only the band-assisted flag, but that was because at that point I already had several years of experience training calisthenics.
I want you to keep this in mind, because if you are just starting out or have been training for less time, it is normal for it to take longer to achieve it.
Even so, the human flag usually requires less time than other skills such as the front lever or the full planche.
To give an estimated timeframe, I would say you can achieve it in 2 to 6 months if you have already been training calisthenics for some time.
As I have mentioned several times throughout the article, you do not need to do too many exercises or progressions for the flag.
You only need one specific exercise, such as the band-assisted flag, to keep improving in basics like pull-ups and vertical push-ups, and you could complement this with the side plank or hanging side pull to place a bit more emphasis on the obliques and hip abductors.
Now, if you are looking for something more specific and complete, either because you want to fully master this skill or because you want to achieve it faster, I recommend the Human Flag Program, which you can find in Calisteniapp.
The human flag is one of the most impressive skills in calisthenics, but also one of the most accessible for those who already have a good strength base. Although it may seem impossible at first, the reality is that, with correct technique, patience, and an appropriate progression, it is a movement that many people can achieve in relatively little time.
As we have seen throughout the article, the pillars of this exercise are pushing and pulling strength in the shoulders, along with lateral core stability. That is why, rather than looking for strange exercises or overly complicated progressions, the most important thing is to build a good base and progress little by little toward the final position.
Now, if you want to follow a more complete plan, with structured progressions, specific routines, and the entire process organized step by step, you can take a look at the Human Flag Program available in Calisteniapp.
Personalized quiz
Answer 7 quick questions and we will recommend the program that fits you best.
Join our newsletter
Learn everything you need to know about calisthenics
Discover what equipment a calisthenics park should have: bars, structures, stations, and key elements to train correctly.
Discover what a calorie deficit is, how to calculate it based on your activity level, and how to apply it if you train calisthenics to lose fat without losing muscle.
We define what strict reps in calisthenics are, why they matter, and how to apply them to every exercise.