Calorie Deficit: What It Is and How to Calculate It If You Train Calisthenics
Discover what a calorie deficit is, how to calculate it based on your activity level, and how to apply it if you train calisthenics to lose fat without losing muscle.

When it comes to learning how to do a handstand, there are different approaches, different styles and methodologies. But in my experience, some of them are long, tedious and frustrating, and others get results much faster and more consistently.
In this article I would like to explain 10 tips that will speed up your learning process of this movement a lot and will prevent you from getting frustrated or feeling like you can't do it.
Many people who are trying to learn the handstand have in mind that the strict technique is with the elbows locked, and therefore they try to learn it directly like that.
The thing is that learning the balance with the elbows locked is much more difficult, while if you let the elbows bend slightly you will be able to control your body position much better and achieve that balance quickly.
Once you get it, you can learn to control the balance with the elbow lock and perfect the technique, since, indeed, the strict technique is like that. But each thing in its own time!

Another aspect of strict technique is the issue of tucking your head between your arms and looking “back” so to speak. Again, it is correct that the strictest handstand technique is in this position, but it is much more difficult, therefore, it is not something that a beginner can learn directly in an easy way.
While you are learning, it is much more effective to always look at the ground, at a fixed point a little further forward from where your hands are. This way you will have a reference of your position in relation to the ground and you will be able to control your balance much better. When you tuck your head in you lose that reference so it is something that only advanced athletes can do.
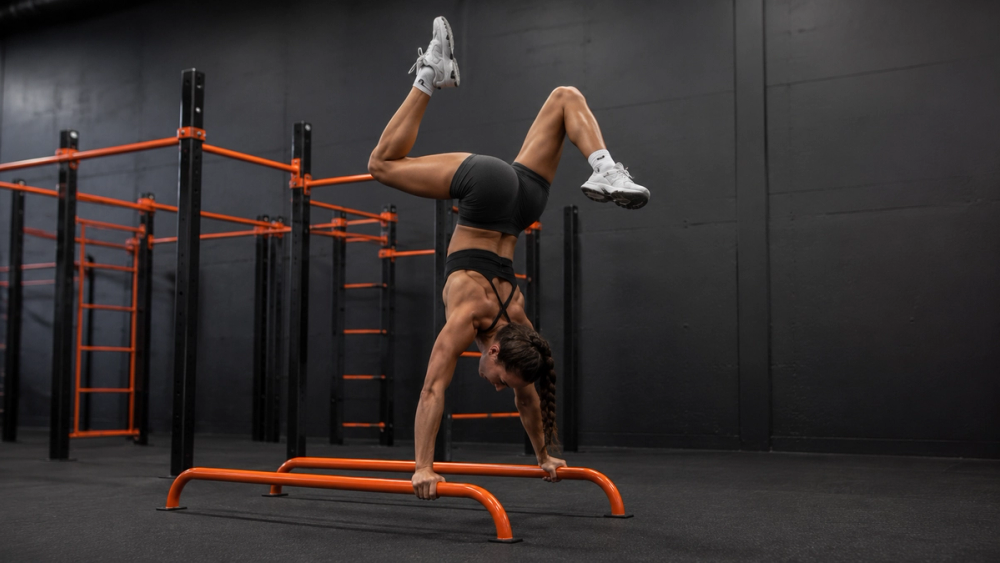
If you have push-up grips or low parallel bars, it is a good idea to learn to do a handstand by combining work on the ground with that of these implements.
First, because it gives you more versatility when it comes to being able to do a handstand in different places and allows you to progress to more difficult movements that are done on the parallel bars. Second, because it is easier to do a handstand on the parallel bars, since you can control your balance much better with movements of your wrists.
Also, if you practice it only on the floor or only on grips, you will get used to doing it that way and then it will be tedious to learn the other way, while, if you combine both during learning, you will not have that problem.

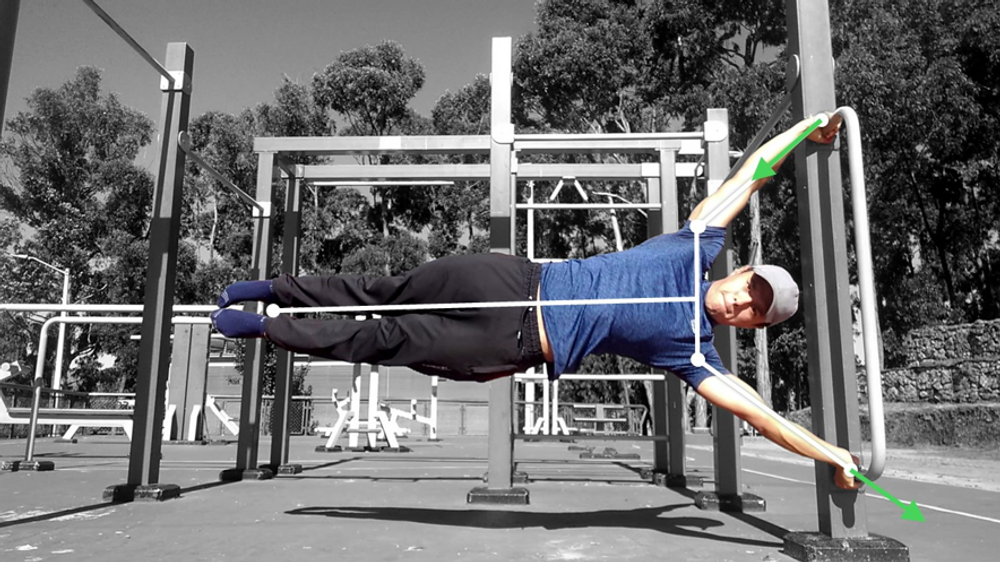
When it comes to controlling the handstand, we can use our elbows, as we saw in point 1, our wrists, our shoulders, our body position, our hip position, even our knees and ankles. But there is an extra point of control that is often not taken into account, the fingers.
You see, if you place your hand completely flat on the floor, your fingers will not be able to help you control your balance, since you will have no range of movement. But if you place your fingers slightly bent, in a “claw” position, they can help you because you will have room to move them and make small adjustments.

Linking with the previous points, you must realize that the handstand is a very complex movement, which requires adapting your brain to something totally different from what it is used to.
In this way, trying to do the perfect technique from the first minute is like telling a person who doesn't know how to swim to practice a strict butterfly technique… it wouldn't work. First they have to learn to stay afloat, then little by little they will learn to improve their technique.
The same thing happens with the handstand, the natural process is that you first learn to keep your balance as best you can, using all the resources you need, and then over time you gradually perfect the technique.
Some people who are learning to do a handstand do their jumps by starting standing, raising their arms towards the sky and launching themselves forcefully towards the ground to take advantage of the momentum. This encourages the jump to be uncontrolled, and difficult to adjust.
It is much more effective to place yourself with your hands on the ground and the launch to come from your legs, so that if it is too gentle or too strong, you can adjust it and learn what the exact measure is.

As I mentioned in the handstand push-up tutorial article, the first step to be able to practice a handstand safely is to know how to fall by rotating your hips, and avoid falling on your back.
There are people who have enough flexibility to do the bridge when they fall on their back and land safely, but the problem is that maybe one day you want to practice a handstand on parallel bars with greater height and you can't resort to falling on your back because it can be catastrophic.

The handstand is not a skill that requires great strength, but it does require a minimum amount of strength.
If you see that when you train the handstand your arms and shoulders are very unstable, with rapid movements that don't allow you to fix the position, like a "trembling", it is indicative that you lack strength.
Train push and vertical push routines at least twice a week to solve this problem. At Calisteniapp we have handstand and push training programs, as well as routines that can be very helpful.

One of the resources that is often used to maintain balance when you are in a handstand position and the weight is on your back is to take small steps with your hands to recover the center of gravity.
This is the only resource that I would recommend you avoid, since by using it you are taking away the opportunity to learn to control that center of gravity with movements of the wrists and fingers, so you are replacing a control that can be very useful with a "fix" that will not serve you at all in the future.
If at any time you need to know how to walk doing a handstand for something specific, you can easily learn it if you already have the balance mastered.
One advantage of practicing handstands is that they usually do not tire the muscles involved too much, so you can train them daily without any problem.
What I usually recommend is that you do between 10 and 20 minutes of handstand practice after warming up and before your routine every day that you train at least.
On many occasions the terrain where we are practicing handstands is not flat. Most calisthenics parks have a small slope so that the water does not stagnate when it rains. If this is the case, I recommend that you always practice it downhill as it is slightly easier than uphill. Also if you are on the beach it is easier to do it downhill towards the sea.
Anyone who has been training calisthenics for a while knows that many movements are easier barefoot. The weight of the shoes, even if they are light, is very noticeable as they are usually the part furthest from the support point, which also occurs in handstands.
Therefore if you practice it barefoot you will notice that it is actually easier than with shoes.
Many people focus on training with the help of the wall, but normally this leads to very slow progress, as you avoid learning to control your balance yourself and also avoid losing your fear of falling.
Working on a wall is good for improving some technical aspects but I don't think it is suitable for learning to control your balance.
I hope it helps you a lot and that you progress in your handstand training.
By Yerai Alonso
Personalized quiz
Answer 7 quick questions and we will recommend the program that fits you best.

Yerai Alonso
Cofundador de Calisteniapp, referente en calistenia y el street workout en Español. Con más de una década de experiencia, es creador de uno de los canales de YouTube más influyentes del sector. Autor del libro La calle es tu gimnasio, campeón de Canarias y jurado en competiciones nacionales e internacionales.
Join our newsletter
Learn everything you need to know about calisthenics
Discover what a calorie deficit is, how to calculate it based on your activity level, and how to apply it if you train calisthenics to lose fat without losing muscle.
Learn how to do the human flag step by step. Muscles involved, progressions from scratch, common mistakes, and a routine to achieve it.
We define what strict reps in calisthenics are, why they matter, and how to apply them to every exercise.