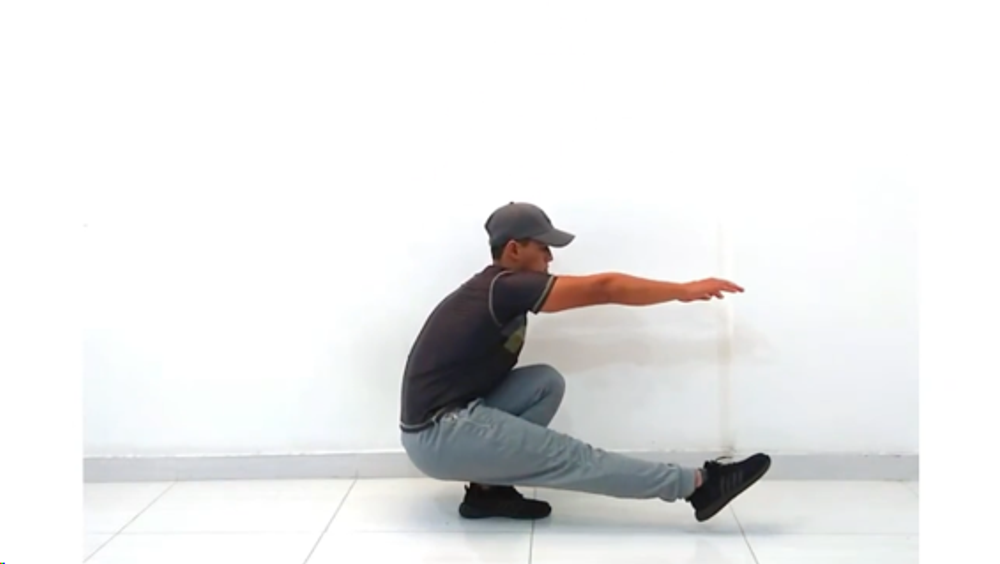
Pistol Squat: Technique, Progressions, and How to Get It From Scratch
Learn how to do the pistol squat step by step. Correct technique, muscles involved, common mistakes, and progressions from beginner to a full pistol squat.

One of the biggest appeals of calisthenics is learning different movements, exercises, or “skills” that look impressive, eye-catching, or challenging.
A lot of people have one of these movements in mind as a goal, but they run into the same question: Which one should I learn first? That’s a completely reasonable doubt, because it’s often hard to tell at a glance which skills are actually easier to learn.
In fact, many people misjudge the difficulty of certain exercises. It’s common to see people think a front lever or a planche is relatively easy, while a pseudo planche on the bar or a back lever looks extremely difficult, when in reality it’s often the other way around.
In this article, we’re going to go through a guide so you can understand the logical path of calisthenics progressions by level and clearly see how to move forward step by step, from the most beginner-friendly skills to the most advanced ones.

There are two main reasons:
To avoid injuries. One of the most common reasons people get injured in calisthenics is trying skills or exercises their body is not ready for yet. That’s why knowing the progressive order of calisthenics skills can help you avoid this problem.
To make logical, steady progress. If you’re a beginner and you try to learn one of the most advanced skills right away, your progress will be very slow, you’ll feel stuck, and it will seem like you’ll never reach your goal. On the other hand, if you choose a skill that actually matches your level, you’ll see meaningful progress from workout to workout and feel that your goals are achievable within a reasonable time frame.
The key to progressing in calisthenics is building a solid foundation first.
In our sport, that foundation is built with the following exercises:


Depending on your starting point, it may take more or less time to master these exercises. But they are the base that will let you progress in everything else later on, so don’t neglect them.
Once you feel comfortable with the basic exercises, you can start trying your first skills. Here are some that are genuinely simple to learn, while still looking flashy and impressive.


In this section we have skills you can start aiming for once you already have a solid command of the basics, but that are not as easy or quick to learn as the ones in the previous section. These skills will usually require at least a few months of training with specific exercises and progressions for each one.
If you need help learning them, remember that in Calisteniapp we have training programs for each of these skills.


Now we move on to the skills that are often the “end goals” for many people who start calisthenics. These are the kinds of movements athletes consider to be among the highest levels in our sport.
These are usually skills that take at least several months of dedicated training—if not years, in some cases.
Remember that you have training programs for each of them in our app, and if you want more specific information about static skills in calisthenics, check out this complete detailed guide.


Here’s an example of what a typical progression might look like for a calisthenics athlete starting from beginner level with some of the most common skills:
Rushing is never a good idea. One of the most common mistakes is trying skills, progressions, or exercises without proper preparation and forcing your muscles and connective tissue too soon. This often leads to injuries, discomfort, or pain. Use this guide to follow a logical order based on your level, prepare properly for each movement, and avoid falling into this mistake.
Another very common mistake is trying to learn something like the planche or the front lever only by doing attempts of the skill itself, without using specific preparatory and strengthening exercises, structured progressions, or dedicated routines for that movement. If you’re genetically gifted and things come easily to you, you might get away with learning some skills like this. But one thing is certain: it will take longer, your injury risk will be higher, your progress will be less solid, and you won’t learn the technical details of each skill as effectively.
A lot of the time, people spend weeks or months training for a skill without really looking into the technical details—body position, involved muscles, leverage, and so on. This can lead to learning the movement with incorrect or inefficient technique, which means wasting time and then having to spend weeks or even months fixing it later. Pay attention to this from the beginning and you’ll avoid wasting training time.
As the saying goes, “he who tries to do too much ends up doing little well.” If you try to learn too many skills at the same time, you’ll probably progress very slowly in each one. It’s better to choose just 1 or 2 main skills and focus most of your training on them. Once you master them, move on to the next ones and just do enough maintenance work to keep the ones you’ve already built. That way, your progress stays at the right pace.
Some of the most important skills and progressions require a certain level of mobility and flexibility. For example: the muscle-up, back lever, and Hefesto require good shoulder extension mobility; straddle progressions require good leg-opening mobility; handstand work requires good shoulder flexion mobility; muscle-ups and planche work require good wrist mobility, and so on. Ignoring this part can slow down your progress and may even prevent you from achieving the skill at all. For example, if you want to do a straddle planche but have very limited leg opening, it will be much harder, because without opening the legs the leverage becomes more demanding. Every time you train for a skill, check whether it requires specific mobility and work on it so that, at the very least, you meet the minimum requirement to perform it.
As we mentioned, in Calisteniapp you’ll find specific training programs for each of these skills. We also have another training method called EVO Routines, which give you a routine that automatically adjusts every time you complete it based on your feedback, so you can keep progressing in the smoothest and most effective way possible. Download it now and take a look.
In most cases, people learn the muscle-up first, because it requires less pulling strength than a front lever and is usually achieved faster. If you already have a solid pull-up base, you can go for the muscle-up first, and once you’ve mastered it, you can focus on the front lever.
That depends on your starting level and on the specific skill we’re talking about. Easier skills can be learned in days or weeks, while more advanced ones may require months—and in some cases even years.
Some skills require at least a pull-up bar, such as the muscle-up, front lever, or back lever. Others, however, can be practiced at home without equipment, such as the handstand, planche variations, or push-up freestyle movements.
As mentioned above, there are several calisthenics skills that can be trained at home without equipment, such as the handstand and its variations, planche work, the V-sit, push-up freestyle skills, and more.
By Yerai Alonso
e entrenamiento con ejercicios y progresiones específicas para cada uno.
Si necesitas ayuda para hacerlos recordarte que en Calisteniapp tenemos programas de entrenamiento para cada uno de ellos.
Muscle up: Uno de los ejercicios más icónicos de la Calistenia. Una vez tengas fuerza suficiente para las dominadas normales, puedes comenzar a intentar dominadas explosivas, que son la clave para conseguir el muscle up. Además, tendrás que entrenar la técnica y la transición para conseguirlo. En este artículo tienes una explicación más detallada.
Back lever: Consiste en colgarse de la barra con el cuerpo paralelo al suelo boca abajo. Requiere una cierta fuerza de empuje, movilidad de los hombros y una adaptación específica al movimiento, pero normalmente en unos pocos meses lo puedes conseguir.
Bandera: Uno de los movimientos más llamativos. Dependiendo de si se te da mejor la fuerza de tirón o la de empuje te resultará más o menos difícil. Comienza con progresiones con piernas encogidas y piernas abiertas y poco a poco lo irás dominando.
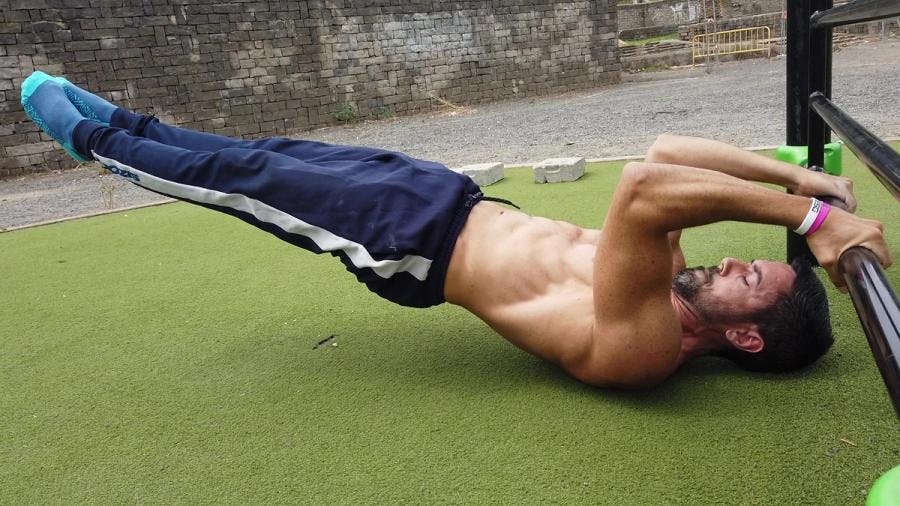
Dragon flag: Un ejercicio espectacular y no tan difícil de dominar, siendo probablemente el más asequible de este nivel. Tienes una guía completa en este artículo.
Pino: Otro de los movimientos clave y que te abrirá las puertas a trucos de mayor dificultad. Cuando ya tengas suficiente fuerza en empuje, es cuestión de darle mucha práctica e ir aprendiendo detalles sobre la técnica que te permitan controlar el equilibrio. Tienes una explicación detallada en este artículo.
Swing 360 y tornado: Dos de los movimientos básicos de dinámicos. Dependiendo de tu agilidad y de tu historial anterior puede que te resulten sencillos de dominar o que te requieran más dedicación. Te dejo un vídeo tutorial:
Vamos ahora con los trucos que suelen ser los objetivos "finales" de muchas personas que comienzan en Calistenia. Este tipo de trucos son los que los atletas consideran llegar al nivel más alto de nuestro deporte.
Normalmente son movimientos que llevan como mínimo varios meses de entrenamiento dedicado, si no años en algunos casos.
Recuerda que tienes programas de entrenamiento de cada uno de ellos en nuestra aplicación y si quieres más información específica sobre los estáticos en calistenia mira esta guía completa detallada.
Plancha straddle, full y maltesa: Las principales variantes de plancha, en orden de dificultad. La versión straddle es con las piernas abiertas, por lo que es la más "sencilla" de realizar, la versión full es con las piernas cerradas y, finalmente, las versiones en maltesa implican tener una amplitud de agarre tal que el cuerpo está prácticamente a la misma altura que las manos, y repetiríamos el proceso de primero maltesa straddle y luego maltesa full.
Front lever, victorian y front lever a 1 mano: El truco de tirón por excelencia. La versión "victorian" consiste en tener el torso a la misma altura que las manos, normalmente utilizando los antebrazos como apoyo, y como paso adelante tendríamos el front lever a 1 mano. En este movimientos también se pueden usar las variantes straddle y full para los diferentes pasos. En este artículo tienes una guía completa y muy detallada sobre todo lo relacionado con el front lever y sus variantes, incluidas algunas menos conocidas.
Hefesto: Uno de los movimientos más difíciles y llamativos, consistente en un tirón de espaldas a la barra, hasta quedar en posición de korean dips. Este movimiento requiere mucha adaptación y preparación, ya que es bastante exigente con nuestras articulaciones y tejido conectivo, especialmente con los tendones del bíceps, por lo que debes tener mucho cuidado.
Impossible dip: Un ejercicio popularizado por Artem Morozov, que consiste en hacer un fondo apoyando los antebrazos sin inclinar el cuerpo hacia delante y manteniendo la cadera adelantada con respecto a los hombros. Es un movimiento tremendamente técnico que requiere una gran fuerza de tríceps.
V-sit: En este caso el mayor limitante puede ser la flexibilidad, ya que a nivel de fuerza no es tan exigente como los otros movimientos, pero sí que requiere que podamos elevar nuestras piernas en una flexión de cadera muy amplia.
Pino a una mano: Un movimiento tremendamente técnico que normalmente requiere años de práctica constante.
Dominada a una mano: Este ejercicio es una de las mayores demostraciones de fuerza de tirón que podemos realizar. Por suerte, tienes cantidad de progresiones asimétricas y unilaterales que puedes realizar para avanzar paso a paso de forma constante. En nuestra Rutina EVO puedes seguir este proceso guiado y adaptado a tu nivel.
540, 720, 900: Algunos de los movimientos clave para los atletas de dinámicos de nivel avanzado. Siendo vuelta y media, dos vueltas y dos vueltas y media respectivamente, estos trucos requieren una agilidad y control corporal notables. Para algunas personas, puede ser relativamente fácil llegar a realizar al menos el 540, pero si quieres hacerlo limpio, con buena altura, con la caída controlada y con posibilidad de enlazarlo con el siguiente truco, sí que suele requerir al menos unos meses de práctica.
Te dejamos un ejemplo de cómo sería una progresión típica de un atleta de calistenia que comienza desde principiante con algunos de los trucos más comunes:
Las prisas nunca son buenas consejeras. Uno de los errores más comunes es querer probar trucos, progresiones o ejercicios sin haberse preparado bien y forzar tu musculatura y tejido conectivo. Muchas veces esto conlleva lesiones, molestias o dolores. Aprovecha esta guía para tener un orden lógico de qué ejercicios ir probando según tu nivel y cómo irte preparando para cada uno y no caer en este error.
Otro error muy frecuente es querer aprender, por ejemplo, la plancha o el front lever solo haciendo intentos de dichos trucos, sin utilizar ejercicios específicos de preparación y fortalecimiento, progresiones y rutinas para dichos movimientos. Si eres un portento genético y tienes facilidad es posible que consigas algunos movimientos de esta forma, pero lo que es seguro es que tardarás más tiempo, tendrás más probabilidades de lesiones, tu progreso será menos consolidado y no aprenderás tan fácilmente los detalles técnicos de cada truco.
Muchas veces nos pegamos un tiempo entrenando para un truco sin realmente indagar en los detalles técnicos, de postura, los músculos implicados, las palancas, etc. Esto puede hacer que aprendamos el movimiento con una técnica incorrecta o ineficiente y que perdamos el tiempo para luego tener que dedicar semanas o meses a corregir. Interésate desde el principio por este aspecto y así evitarás malgastar tus entrenamientos.
Como se suele decir: "el que mucho abarca poco aprieta". Si quieres aprender muchos trucos a la vez, es posible que avances muy lentamente en cada uno. Mejor elige solo 1 o 2 trucos principales y centra la mayoría de tus entrenamientos en ellos. Una vez que los domines, pasa al siguiente y dedica solo un poco de refuerzo a no perderlos y con eso tendrás un progreso al ritmo adecuado.
Algunos de los trucos y progresiones más importantes requieren de una cierta movilidad y flexibilidad. Por ejemplo: el muscle up, el back lever y el hefesto requieren buena movilidad en tu extensión de hombros, las progresiones straddle requieren buena movilidad en tu apertura de piernas, los ejercicios de pino requieren buena movilidad en flexión de hombros, el muscle up y las planchas requieren buena movilidad en tus muñecas, etc. No trabajar esta parte hace que se entorpezca tu progreso e incluso puede bloquear que consigas el truco. Por ejemplo si quieres hacer plancha straddle y tienes muy poca apertura de piernas, te resultará muchísimo más difícil, ya que al no abrir las piernas la palanca aumenta. Cada vez que estés entrenando para un truco, revisa si necesitas movilidad específica y trabájala para, al menos, tener el mínimo requerido para poder realizarlo.
Como hemos comentado, en nuestra aplicación Calisteniapp tienes programas de entrenamiento específicos para cada uno de estos trucos. Además, también tenemos otro metodo de entrenamiento llamado rutinas EVO, que te plantean una rutina que se va modificando automáticamente cada vez que la realizas basándose en tu feedback, para que vayas progresando de la forma más fluida posible. Descárgala ya y échale un vistazo!
Normalmente se aprende primero el muscle up, ya que requiere menor fuerza de tirón que un front lever y se suele conseguir más rápido. Si ya tienes una buena base de dominadas, puedes ir a por el muscle up, y cuando lo domines puedes centrarte en conseguir el front lever.
Dependerá de tu nivel inicial y de qué truco concreto estemos hablando. Los trucos más sencillos pueden aprenderse en días o semanas, mientras que los más avanzados pueden requerir meses e incluso años en algunos casos.
Algunos trucos requieren al menos una barra de dominadas, como por ejemplo el muscle up, el front lever o el back lever. Mientras que otros se pueden practicar en casa sin equipamiento como el pino, las planchas o los movimientos de freestyle de flexiones.
Como comentábamos, hay algunos trucos de Calistenia que se pueden entrenar en casa sin equipamiento como por ejemplo el pino y sus variantes, las planchas, el V-sit, los trucos de freestyle de flexiones, etc.
Por Yerai Alonso
Personalized quiz
Answer 7 quick questions and we will recommend the program that fits you best.

Yerai Alonso
Cofundador de Calisteniapp, referente en calistenia y el street workout en Español. Con más de una década de experiencia, es creador de uno de los canales de YouTube más influyentes del sector. Autor del libro La calle es tu gimnasio, campeón de Canarias y jurado en competiciones nacionales e internacionales.
Join our newsletter
Learn everything you need to know about calisthenics
Learn how to do the pistol squat step by step. Correct technique, muscles involved, common mistakes, and progressions from beginner to a full pistol squat.
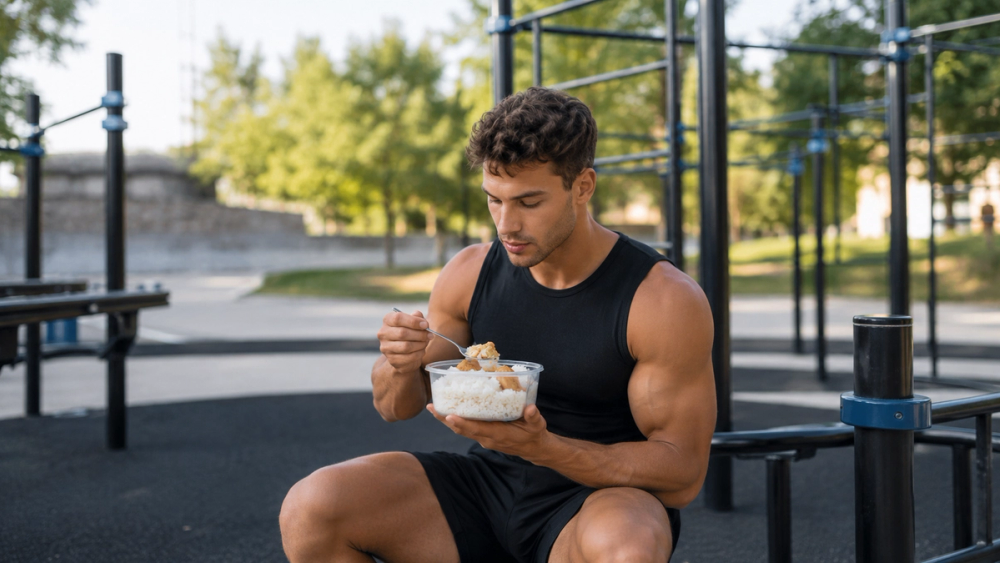
Discover what a caloric surplus is, how to calculate it correctly, and how to apply it if you train calisthenics to build muscle without piling on extra fat.
Discover what equipment a calisthenics park should have: bars, structures, stations, and key elements to train correctly.